Tuesday, January 24, 2023

Mammen Nalbound Largess Hats, Posting the Second

Hats! Hats! Hats! So many hats!


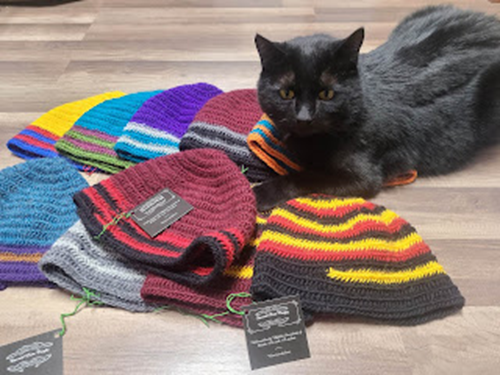
Nero ensures quality control


Not sure when I started making these, but I have turned out a bunch over the years. Time stamps on photos tell me at least early 2018.

*Disclaimer. These are historically plausible items. The Norse practiced nalbinding, and similarly shaped items have been found (milk strainers). But we have not found this style of hat in graves. However the deceased would have been dressed in their "Sunday best" when laid to rest. They certainly wouldn't have been buried in their work clothes. This is plausibly a work hat, worn to feed the livestock, or cut firewood. I find it to be a very capable hat for those tasks.

I came up with a little formula. All done with Mammen stitch and tensioned to my thumb.

CO = Cast on

N2TSL = Nal two through same loop, make two stitches in the same loop

N x STS = Nal X stitches, make X number of plain stitches

Rx = Round X


CO 12 STS over slip knot, join making sure the tail tightens the loop, don't tighten until at least round two

R1: (N2TSL), repeat until end (24 sts total) Place marker in stitch one, move marker with each round.

R2: (N2TSL, Nal 1 STS), repeat until end (36 sts total)

R3: (N2TSL, Nal 2 STS), repeat until end (48 sts total)

R5: (N2TSL, Nal 3 STS), repeat until end (60 sts total)

R6: (N2TSL, Nal 4 STS), repeat until end (72 sts total)

R7: (N2TSL, Nal 5 STS), repeat until end (84 sts total)

R8: (N2TSL, Nal 6 STS), repeat until end (96 sts total)

R9: (N2TSL, Nal 7 STS), repeat until end (108 sts total)

R10: (N2TSL) Plain stitch for the rest of the round (109 sts total)

Nal plain rounds until desired length. Eight inches from point to brim is my usual.

Weave in ends.


Need a different size? Add or subtract an increase round as needed. For my own personal I do an extra increase round in order to get a bigger diameter.


Most recent hats as of this posting.


Really fond of this color combination. One of the original hand written labels.


Bigger batch, including two extra stripy hats as a commission.


Rahja inspecting.


Photo didn’t show the purple very well. Hulk smash!


Larger batch, including a commission for a Cap of Maintenance.


Ezabi inspecting the progress.


Two, and an almost complete third.


Spiral. Same formula for two or three color spirals. However for ease of work I will use stitch markers. Remember for two colors each one will only do half of an increase round, three colors will do a third.


Ezabi looking pretty.


Ezabi isn’t sure about hats in a hat.


Always more color combinations.


Happy little accidents, changed colors too soon on the brown, got extra stripes.


Nero checking out the hats before packaging.


Stripes and colors.


Pretty photo op. The dark grey heather has to be my favorite, looks great with all the colors.


Three color spiral. Note all the stich markers to keep track of increases. Easy to get lost if you don’t have those for the multi colors.


Ezabi helping again.


Nero has claimed the hats for his own.


Early hats with handwritten labels.


Yuri inspecting.


Second three color commission in progress.


Being a huge fan of Halloween, this orange hat made me very happy.


Rahja is not impressed.


*Intense stare*


Early hats waiting for the labels to be written.


Very spring. Flowers are returning.


Two talented artists and lovely ladies received hats at West An-tir War 2018.


Ren fair table 2022.


There was a children’s book I remembered in which a cap merchant has an entire stack of caps stolen off of his head by monkeys. So I made a stack of hats.


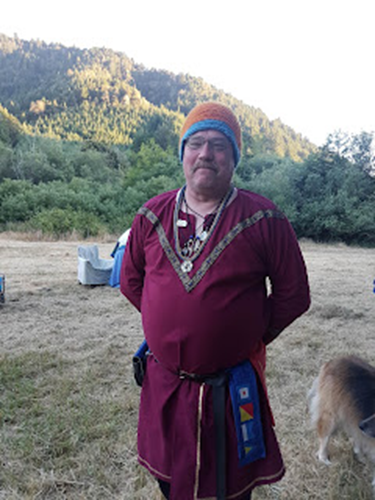
Hat recipient at West An-tir War 2018.


Yuri inspecting.


Monday, January 23, 2023

Coronet reflections

 Oerthan Winter Coronet, in which a wonderful time was had by all within the Gates of Winter. Good friends, good food, and getting to see the chosen family from both near and far.

Following are some of my notes from my little corner. Coming together to compare A&S notes is a wonderful thing. Not quite getting a technique? Bring your project and talk to friends.


Flick and ride. There are three of us in the Principality that regularly wander around events while spinning. Two regularly use a hand distaff. I have really gotten into using a distaff with a medieval style low whorl spindle. Over the last few years I have gotten lots of compliments that I look like a painting come to life. In such I use a technique called grasped spinning, you don't suspend the spindle like the  modern spindle spinning revival, but instead use the forming yarn and your thumb to keep the spindle tip in hand. A medieval spindle doesn't get the momentum that a modern one does, so it takes lots of little flicks to keep going. Please remember, neither way is wrong, they are just different.

Friend was having issues with the grasped style and wanted some help. The two of us have bounced lots of ideas off each other over the years, and it is wonderful to watch the lightbulbs go off when there has been some struggles.


Two fingers move the tip of the spindle to the thumb tip.

Middle finger pulls back for the flick.


Let it ride. Momentum will run out soon, so back to the beginning for another flick.


Distaff tutorial. We have a new spinner in our midst. So we were able to let her try ours, and talk about what you can use, different styles from different cultures, etc. Don't get me wrong, I absolutely adore my handmade reproduction distaff (yellow ribbon). But I also still have and still use my first distaff, a willow stick from the yard (purple ribbon).

Started to spin for a plying tutorial. (Blue fuzz and yellow ribbon) Learned about the fuzz. Am actually glad that I brought this to spin. Had purchased for a spinning class I plan on having, once I make the beginner spindles and distaffs. Glad I tested this wool, it is not a beginner friendly fiber. Well prepared, but very short staple length. Will have to do different wool for the class.


Thumb tension and needle tension. Questions from friends about consistent loops in nalbinding. I do tons of nalbound hats for largess. (Second post on that subject coming soon) For these hats I tension the loops to thumb size. For a few personal hats though I have tensioned to the needle. 
 

Normal place I tension around the thumb. Good little notch right at the cuticle.


Picking up the required loops


Thumb pulled out


Here's the only step that is different. If snugging to the needle, this is when you do it, otherwise skip.


Pull the needle though, pinch gently with thumb.


Snug down to thumb.


Needle gift! And book gifts! Books were recently published about tablet weaving, and I have long been looking forward to getting copies.

The needle I am absolutely floored about! This is a piece of Ukrainian bog oak. The parent piece made several spindles and needles, and was sent out just after the war started. I am deeply honored to receive this.


Book recommendations. Friend had a copy of this book, currently only in Finnish, but we got to look though it. I am absolutely getting an English copy when it comes out in approximately a year.


As always the event was over too soon. Can't wait for the next one!